Meanwhile, continuous wave (CW) called to me. I was just intrigued with the idea of communicating using Morse Code. The learning and studying leading up to the Technician Exam really sparked an interest and a desire to keep learning.
I found a bunch of online resources aimed at helping people learn Morse Code. The single most useful for me was the Learn Morse site in partnership with Google. I know there are many different philosophies about the “best” way to learn anything and that’s especially true with Morse Code. I really liked the gamified and visual approach Learn Morse takes. It helped me get up the curve on the alphabet and language quickly and gave me confidence to want to learn more. Who knows. Morse Code Boot Camp may be in my future. And I might write my own adaptation of Learn Morse since it’s open source and available on Git.
Well, I started to really get excited by CW and realized I’d need a radio. I quickly fell in love with the QRP Labs QMX multi-band transceiver. It was an investment for me given this whole HAM radio thing was a new “hobby.” But, I convinced myself it was worth it for multi-band operation and the SWR meter alone!
Then I realized I’d need a key. I checked out the commercially available keys. I ogled at the antique and reproduction wood and brass keys.
And then I saw EI2KC’s video of their saw blade key and I remembered a tool box I bought at a yard sale for $5 with a stack of hacksaw blades in it.
The Build
Remember, a CW key is just a switch. It closes a contact between a supply voltage and common which, in turn leads to a “continuous wave” (CW) signal being generated by a keyer or keying circuit on the upper side band (USB) of your selected frequency.
My approach to building this “switch” was to aim for a side-swipe or side-shift dual key. Pushed to the left, it closes the contacts for my keyer to produce a DAH. Pushed to the right it closes the contact for my keyer to produce a DIT. Or vice verse, my keyer can accomodate either directional bias.
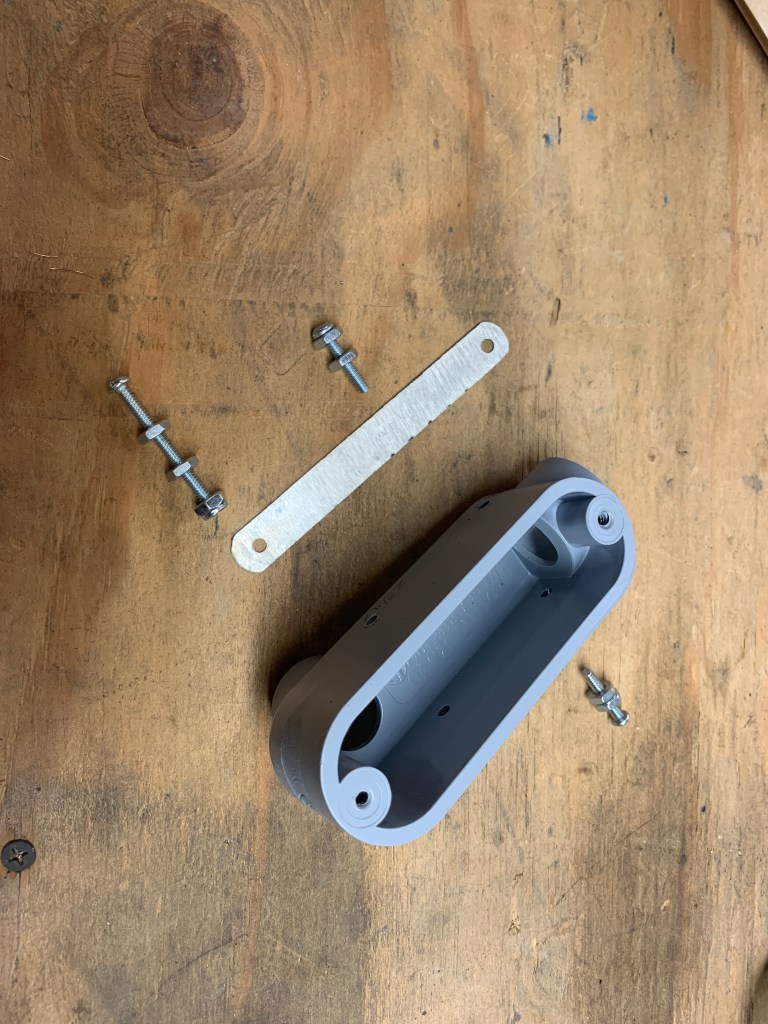
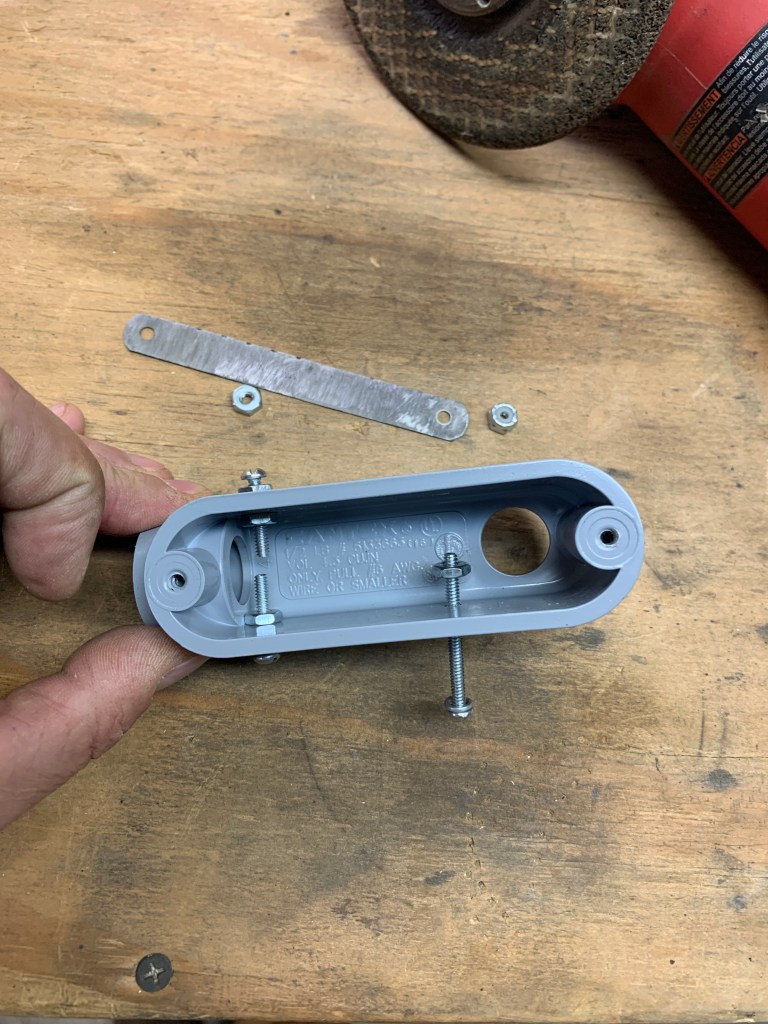
I started with two hacksaw blades. I used an angle grinder to grind down the teeth on the blade and then used a cutting wheel on the same grinder to cut the blades into 4″ lengths that I thought would work well with my enclosure length of 4-1/4″.The blade on the left has had the teeth ground down.I drilled holes on either side of the LB junction box at 1″ and 2-3/4″ from the inlet, right at the parting line of the mold. The holes closest to the outlet (right in this picture) will accept a through-bolt to hold the back end of the blade and provide the common electrical contact. The holes closest to the inlet (left in this picture) will accept individual bolts to serve as the selectable contacts for DAHs and DITs (side-swipe key). By the way, this could (and does) work as a straight key. It all depends on the setup of your keyer which turns the contact closer of this key into a signal.I chose to use a 1/2″ LB Junction box. The LB indicates that inlet is aligned with the access panel and the outlet is in back. Here’s a nice reference about junction box nomenclature. In this photo you can see the drilled holes, the nuts and bolts being used for each location and the trimmed saw blade.
I opted to use two nuts on either side of the junction box wall to allow for “locking” the bolt in place once I found the right location. I wanted to have some adjustment of the “throw” of the blade using the front bolt threaded depths as well as being able to adjust the “center” of the blade with the single, back through-bolt.
Here are the two first keys I made in a view that lets you see the basic mechanical layout. One was for me one was for KE2DFG (my brother, Kurt). I’m not quite sure why I ended up with the two front holes not being aligned. I drilled from either side and could have gone straight through to avoid that. I don’t think it matters much since both are independently adjusted for “throw.”
The electrical wiring is best approached remembering that this key is just a double pole, single-throw (SPDT) switch with a center rest. Pushed one way, it closes one circuit (DAH), pushed the other way it closes another circuit (DIT). Without any force on it, it rests in the center with both circuits open (no signal produced).
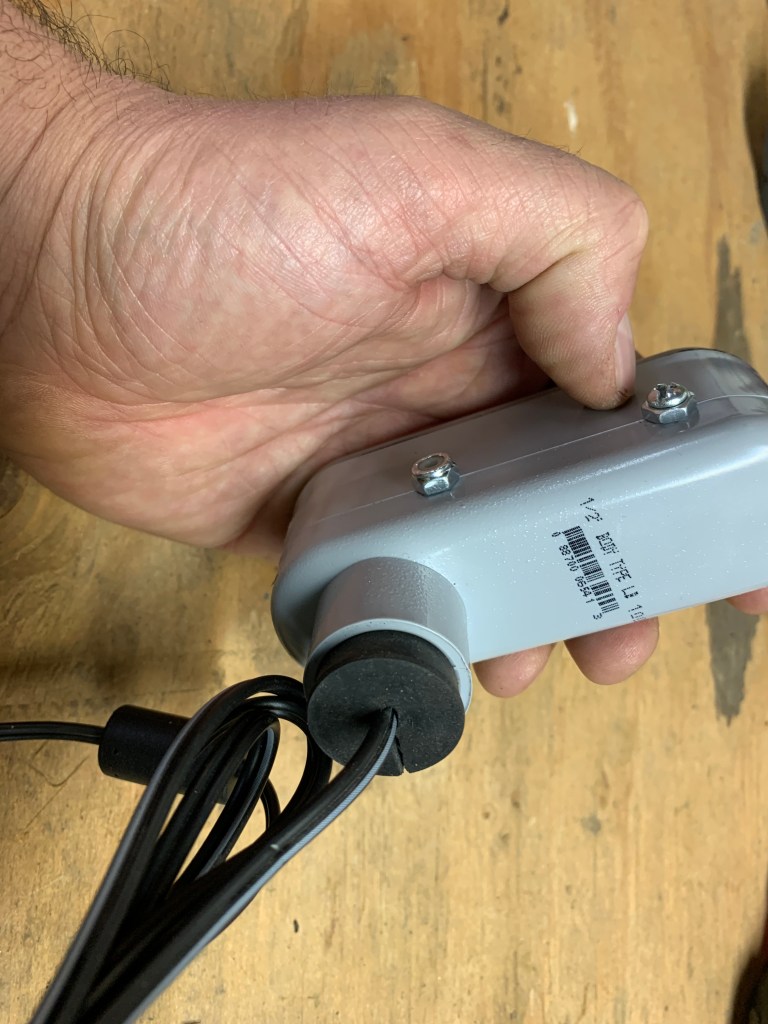
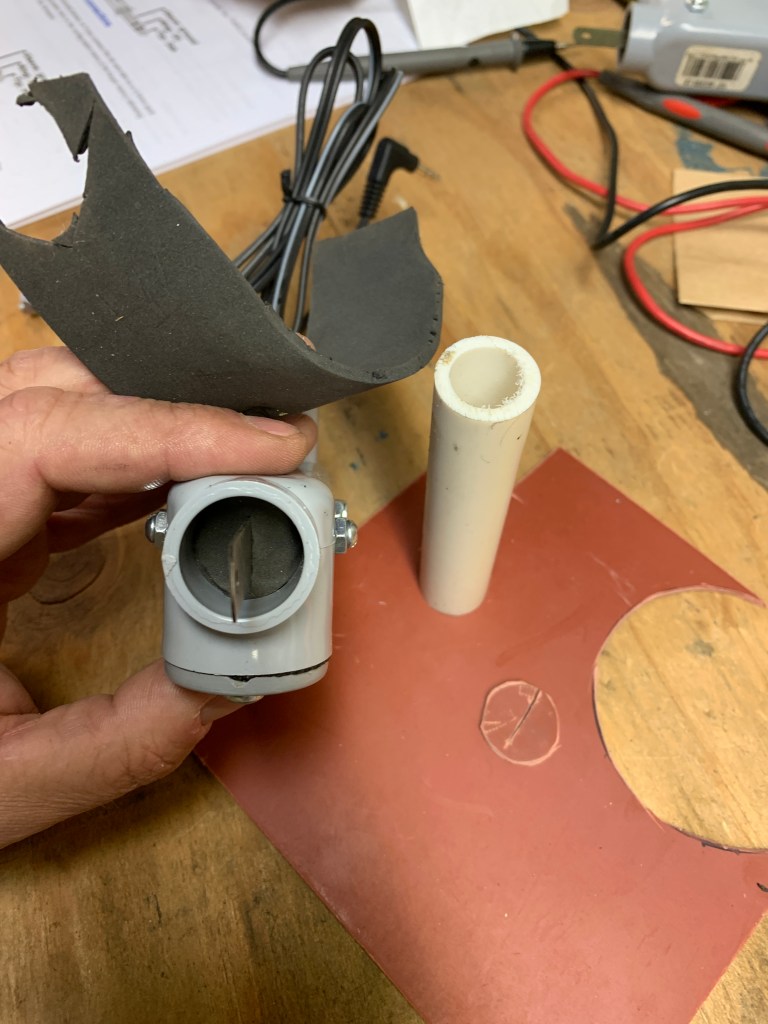
Here is the basic wiring from a 3.5mm stereo phone jack. I was building this key for use with my QRPLabs QMX which has a great manual and a pinout for a keyer. Pretty simple, common is connected to the through-bolt on the tail end of the blade. DAH lead is connected to one of the front contact bolts, and DIT lead is connected to the other. I wasn’t too worried about keeping them straight as it was configurable in my keyer and I didn’t actually know how I was gong to hold the thing and use it!The mono jack cable pass-through was handled by finding a rubber stopper of the about the right size, drilling a hole in the center of it, cutting a slit to pass the wire down to the hole and then gluing the stopper in place in the enclosure outlet.I wanted some sort of “dust cap” on the key end of this key. My hope is to get into QRPSOTA and, while I didn’t expect to need a waterproof key, I wanted to try to keep it clean inside. So I started messing around with some standard orange gasket material (too stiff and prone to tearing) and landed on this 1/4″ foam rubber (McMaster #8614K82). Not only does it provide a decent seal, it also helps push the blade to center and gives a nice additional spring to the band saw spring. I liked the feel of it. Note the use of standard 1/2″ PVC piping (or conduit) as a template for cutting the outline. I then just added a small slit for the blade to protrude from. The foam is held in place with some glue.


Leave a comment